

DIY Drum Smoker Build: A Winter Weekend Project With Big Poppa's Kit

January weekends are made for projects, and few are more satisfying than building the smoker you’ll cook on all year. Big Poppa Smokers has been building and cooking on drums for years, and a DIY drum smoker is still one of the best-value cookers in barbecue: simple, fuel-efficient and rock steady at low-and-slow temperatures. This guide walks you through the build with the BPS kit, from sourcing a safe drum and drilling to the burn-out, hardware install and first seasoning. You’ll also learn which upgrades are worth it and what to cook first, so your drum is ready long before spring.
The bottom line: A DIY drum smoker is a 55-gallon food-grade steel drum converted into a vertical charcoal smoker with vents, a charcoal nest and a cooking grate. With the BPS DIY Drum Smoker Kit, the build is a weekend project: mark and drill using the BPS templates, burn out the drum outdoors, install the hardware, then season it. You supply the drum, a drill and two wrenches. Build in the garage, but always burn and cook outdoors.
What Is a DIY Drum Smoker and Why Build One?
A DIY drum smoker is a vertical charcoal smoker made from a 55-gallon steel drum, with bottom vents for air, a top vent for exhaust and a charcoal nest at the bottom. Heat and smoke rise straight past the meat, so it cooks evenly, sips fuel and holds steady temperatures for hours with very little babysitting.
Drums are a favorite on the competition circuit for the same reason they work in the backyard: they’re consistent. Big Poppa Smokers builds drums because a well-built drum holds 250°F for hours on one load of charcoal. Building your own also means you know every bolt, which makes it easier to tune and fix down the road.
Is a drum smoker good for beginners?
Yes. With only a few vents to manage, a drum is simpler to run than most offsets, and its steady heat is forgiving while you learn. Curious how it stacks up? Read Big Poppa’s take on drum smoking versus pellet smoking.
What can I cook on a drum smoker?
Just about everything: ribs, chicken, pork butt, brisket, chuck roast and even pizza or steaks hot and fast. Hanging ribs and chicken from the top of the drum gives you 360-degree smoke. One DIY drum smoker, a whole year of cooks.
What’s in the BPS DIY Drum Smoker Kit
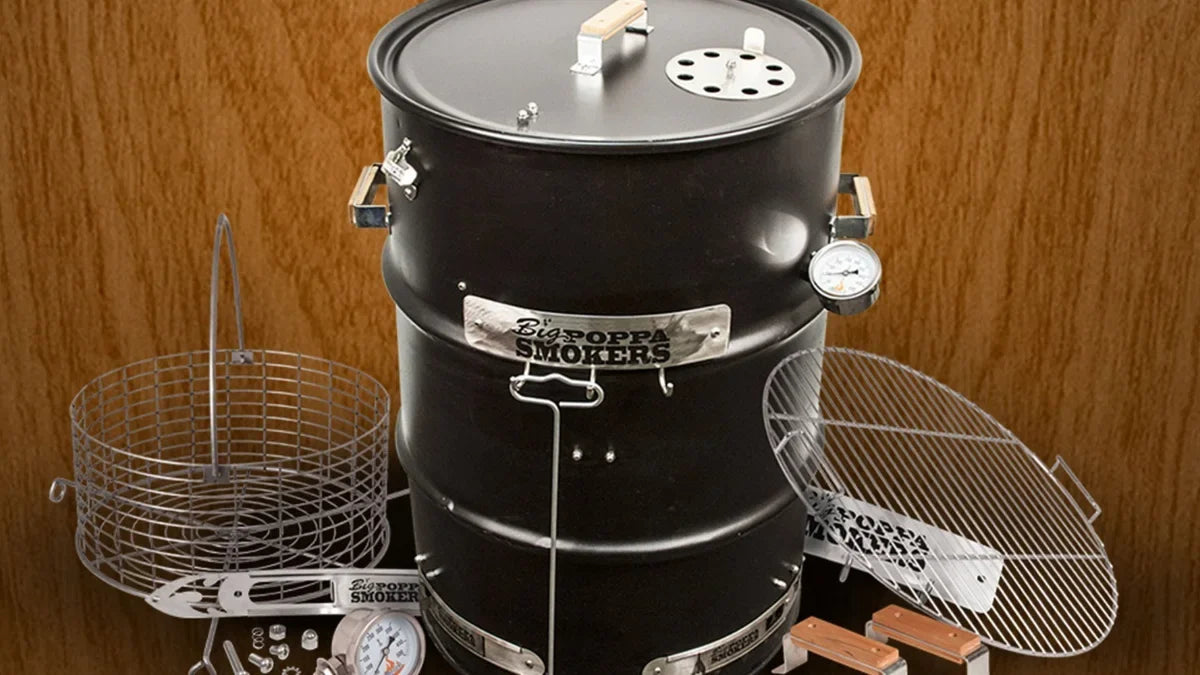
The BPS DIY Drum Smoker Kit includes everything you bolt onto the drum: two stainless steel bottom slide vents, a top vent, a shield, lid hook, lid and drum handles with wood grips, a charcoal nest and nest hook, a nickel-plated cooking grate, a thermometer, a bottle opener and all mounting hardware. You supply the drum and basic tools.
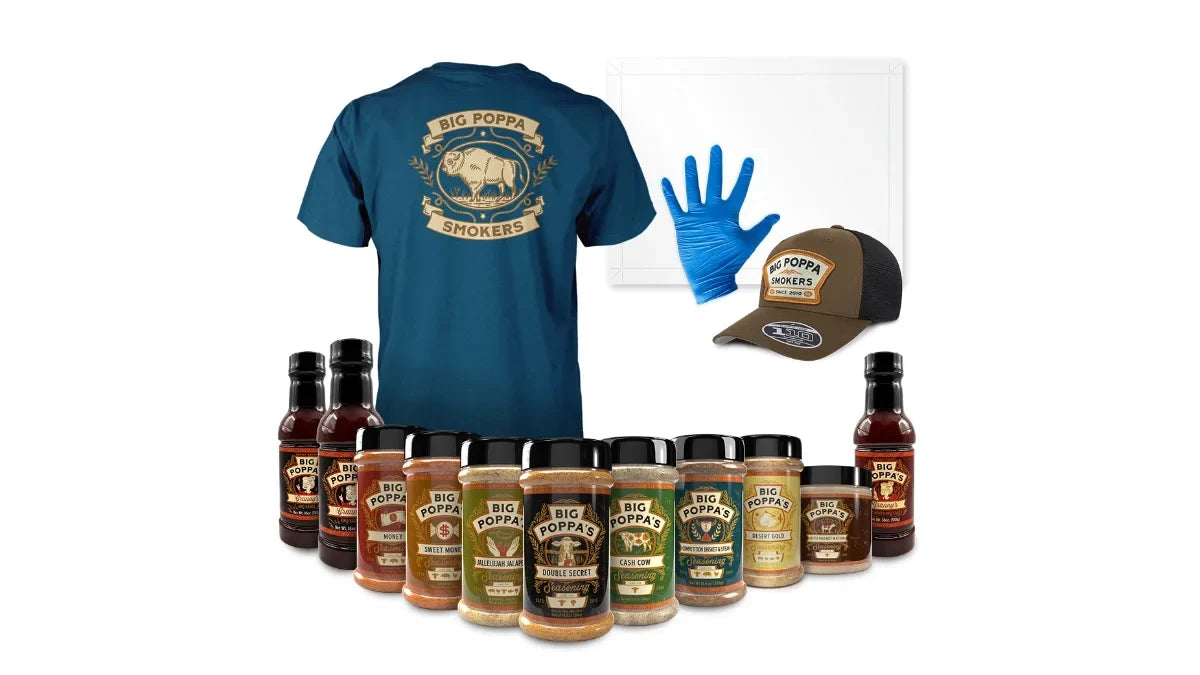
The BPS DIY Drum Smoker Kit ($199.99) is the standard build. Want heavier components? The BPS DIY Drum Smoker Kit – Beefy SS ($299.99) upgrades the grate and charcoal nest to heavy-duty stainless steel. For a complete setup, the BPS DIY Drum Smoker Kit – Starter Pack ($306.99) adds extras such as a Big Poppa cooking mat and a drum smoker cover.
| Kit | Price | Best For |
|---|---|---|
| BPS DIY Drum Smoker Kit | $199.99 | First build, best value |
| DIY Drum Smoker Kit – Beefy SS | $299.99 | Frequent cooks who want stainless grate and nest |
| DIY Drum Smoker Kit – Starter Pack | $306.99 | Complete setup with cover and cooking mat |
What tools do I need?
- A 55-gallon food-quality drum and lid (not included)
- An electric or cordless drill
- A 7/8-inch wrench and a 7/16-inch wrench (adjustable wrenches work)
- A tape measure and a straight edge
- Work gloves and eye protection
How to Choose a Safe Drum
Choose an open-top, food-grade 55-gallon steel drum with a lid, ideally unlined, that previously held food-safe contents. Avoid any drum that held chemicals, solvents, fuel or unknown contents, no matter how clean it looks. A refurbished food-grade drum from a reputable supplier is the safest and easiest place to start.
Unlined drums are easiest to prep. A lined drum needs that liner fully removed during the burn-out, which takes longer and more heat. If you’re not sure what a drum held, walk away. The drum is the one part of the build you never cut corners on.
Expert Tip: Ask your drum supplier what the drum last held and whether it’s lined before you buy. Big Poppa Smokers recommends an unlined, food-grade drum every time, because it makes the burn-out faster and leaves you with clean steel that seasons quickly and evenly.
Can I use a lined drum?
You can, but it’s more work. The liner has to be fully burned out and scrubbed off before you install any hardware or cook on it, and that takes a longer, hotter burn. If you have the choice, buy unlined and save yourself an afternoon.
How to Build a DIY Drum Smoker, Step by Step
To build a DIY drum smoker with the BPS kit, mark the holes with the BPS templates, drill them, burn out the drum outdoors, install the vents, shield, handles and thermometer, then hang the nest and set the grate. Finish with a seasoning burn and a test run. The BPS manual covers every measurement.
- Source the right drum. Find a clean, open-top, food-grade 55-gallon steel drum with a lid. Unlined is best. Never use a drum that held chemicals, fuel or anything you wouldn’t want near food.
- Mark the holes. Tape the BPS drilling templates to the drum and lid, measure twice and mark every hole for the bottom vents, top vent, shield, handles and grate hardware.
- Drill. Drill each marked hole with a cordless drill. Take your time, keep the bit square to the surface and clean up any burrs.
- Burn out the drum. Outdoors and well away from anything flammable, burn out the drum after drilling but before adding hardware. This removes paint, coatings and residue. Let it cool, then scrub out the ash.
- Install the hardware. Mount the bottom slide vents, top vent, shield, lid hook, lid handle, drum handle and thermometer with the included hardware, following the BPS manual.
- Set the nest and grate. Hang the charcoal nest on its hook, set the cooking grate in place and check that the lid seals and every vent slides freely.
- Season and do a test run. Light a full nest of charcoal, run the drum empty, and practice holding 250°F and 275°F with the vents before the first real cook.
Download the assembly manual and the drilling templates from Big Poppa’s manuals and drilling templates page before you start. The templates take the guesswork out of hole placement.
Should I burn out the drum before or after drilling?
After drilling, before hardware. That’s the order the BPS kit instructions recommend: burning out after drilling cleans the steel around every hole, and doing it before the hardware goes on keeps the heat away from your new vents, handles and thermometer. Always do it outdoors, away from buildings and anything flammable.
Safety Note: Wear eye protection and gloves when drilling. Burn out and cook outdoors only, never in a garage or enclosed space, and keep a fire extinguisher nearby.

Make It a Winter Weekend Project
A drum build fits perfectly into a cold-weather weekend. Do the measuring, drilling and hardware work inside a garage or shop where it’s warm and dry, then step outside for the burn-out and seasoning. By the time the weather turns, you’ve got a seasoned, tuned smoker and a few practice cooks under your belt.
- Saturday morning: unbox, read the manual, tape on the templates and drill.
- Saturday afternoon: burn out the drum outdoors and let it cool overnight.
- Sunday morning: scrub the ash, install the hardware, hang the nest and set the grate.
- Sunday afternoon: seasoning burn and a vent-setting test run.
Cold air makes the first runs a little slower, so preheat longer and expect to use more charcoal. Big Poppa’s winter backyard BBQ guide covers windbreaks and fuel planning.
How much charcoal does a drum smoker use?
The BPS charcoal nest holds 10 to 15 pounds of charcoal, which is enough for a long low-and-slow cook in mild weather. Winter cooks burn more, so keep a spare bag nearby. Light only part of the nest and let the fire work its way through the rest for the steadiest temperatures.
Season, Tune and Cook Your First Meal
Season a new drum with a full nest of charcoal, a thin coat of high-smoke-point oil on the bare interior and grate, and a few hours of empty burn time. Use that run to learn your vent settings at 250°F and 275°F. Then start with chicken, which cooks fast and shows you how the drum behaves.
Expert Tip: Learn the drum with the lid closed. Drums recover slowly after the lid comes off because all the heat rides straight up and out. Big Poppa Smokers sets the bottom vents, waits 15 minutes, then adjusts again, and only opens the lid when there’s a reason. Write your vent positions on a strip of tape on the drum and you’ll hit your target temperature every cook.
For setup, burn-in and temperature control in detail, read the first cook on a drum smoker guide. A hanging spatchcock chicken is a great first cook. Season it with Big Poppa’s Sweet Money Seasoning (14oz, $15.99) and you’re in business.
Upgrades Worth Adding to Your Drum
The best drum upgrades make it more durable or more versatile: a heavy-duty stainless grate, a sturdier charcoal nest, a hanging kit for ribs and chickens, and a cover to protect it from weather. Start with the base kit, cook on it for a few weekends, then add the upgrades that match how you actually cook.
Big Poppa Smokers’ advice: upgrade the parts you touch every cook first. The grate and the nest take the most heat and the most abuse, so stainless versions pay for themselves if you cook every weekend. A cover is the cheapest insurance you can buy for a drum that lives outside year-round.
- BPS Beefy Stainless Steel Grill Grate ($73.99): heavy-duty stainless steel cooking surface.
- BPS Drum Smoker Charcoal Nest ($49.99): holds 10 to 15 pounds of charcoal for long cooks.
- BPS Drum Hanging Kit ($73.99): hang ribs, chicken and more for 360-degree smoke.
- BPS Drum Smoker Cover ($43.99): water-resistant cover sized for 55-gallon drums.
Browse every add-on in the drum smoker accessories collection, and see all drum kits and parts. Then try foil boat ribs or a Jack & Coke Chuck Roast on your new drum.
DIY Drum Smoker FAQs
Plan on a weekend. Drilling and the burn-out can happen on Saturday, with hardware install, seasoning and a test run on Sunday. Experienced builders move faster, but a first build goes better when you aren’t rushing the measuring or the burn-out.
Per the BPS kit specifications, you need a 55-gallon food-quality drum and lid, an electric or cordless drill, a 7/8-inch wrench, a 7/16-inch wrench (adjustable wrenches work for both), a tape measure and a straight edge. Add work gloves and eye protection for drilling and the burn-out.
No. The BPS DIY Drum Smoker Kit includes the vents, shield, handles, lid hook, charcoal nest, cooking grate, thermometer and mounting hardware, but you source the 55-gallon food-grade drum and lid yourself.
Use an open-top, food-grade 55-gallon steel drum, ideally unlined and one that held food-safe contents. Avoid any drum that held chemicals, solvents or fuel. A refurbished food-grade drum from a reputable supplier is the safest bet.
You can drill, measure and install hardware in a garage. The burn-out and every fire after that must happen outdoors, in open air, away from the house and anything that can burn. Never run a fire inside a garage, even with the door open.
Start with chicken. It cooks in a few hours and shows you how the drum runs. A hanging spatchcock chicken or a few chicken thighs is a perfect first cook, followed by ribs or a pork butt once you know your vent settings.
Recipes We Think You’ll Love
- How to Hang Chicken in a Drum Smoker — Big Poppa’s Spatchcock Method
- How to Make Ribs with a Foil Boat Finish | Foil Boat Ribs on a Drum Smoker
- The BEST Jack & Coke Chuck Roast | Drum Smoker Sandwich Recipe
- How to Make Drum Smoker Nachos
- Sweet & Savory Teriyaki Pork Steak Nuggets (Drum Smoker Recipe)

Build It This Weekend, Cook On It All Year
Grab a drum, download the templates and start drilling. Explore more in the Cooking Methods & Gear hub, plan your first cooks in the Big Poppa recipe library, pick up the BPS DIY Drum Smoker Kit, and watch Sterling cook on the Big Poppa Smokers YouTube channel. Free shipping kicks in at $79.

Big Poppa Smokers has spent 15+ years helping backyard cooks and competition pitmasters put better BBQ on the table. Led by BBQ Hall of Famer Sterling “Big Poppa” Ball, with 90+ Grand and Reserve Grand Championships behind every recipe, we build premium rubs and sauces and the drum smokers we actually cook on. Learn more | Shop.
Keep learning in the Cooking Methods & Gear hub from Big Poppa Smokers.
Updated on November 20, 2026

1 comment
Hi, could you tell me the size of the smoker handles, I’m looking for one for my smoker.
Do the two ends that screw to the smoker bend slightly downward, so as to fit on a round drum smoker.
Kind Regards
Mr R W Turner
U.K.
Robert Turner
Leave a comment
This site is protected by hCaptcha and the hCaptcha Privacy Policy and Terms of Service apply.